Sunday, April 1, 2012

Small Flash - Blending Flash With Daylight

 Part 1

Blending Flash With Daylight - This is definitely a technique that you should spend time with. When daylight and flash are blended together correctly it has a very natural look to it. I am going to show a couple of ways that I blend these lights together.

Learn From Other Photographers - I want to mention two photographers that do a lot of work with small flashes (strobes). They cover mixing flash with daylight with a lot more detail that I will.

The first one to check out is Joe McNally. He has a blog that is incredible. You can learn so much from Joe it is mind boggling. Joe McNally was a National Geographic photographer for over twenty years. When you take a look at his work you will see how amazing his photography is. Do not pass the chance to learn from Joe McNally. Your photography will improve drastically.

The second photographer to check out is David Hobby. I have mentioned him before in my blog. His blog is called Strobist. David Hobby was a professional photojournalist for 20 years. He worked as photographer for the Boston Sun until 2007. After that he blogged full time for his blog the Strobist. That's full time giving you and I some amazing information to make us all much better photographer.

Use the information I have on my blog and also study Joe McNally's and David Hobby's blogs. If you do this your ability to use flash with other types of light will soar.Enjoy your adventure! Love your results.

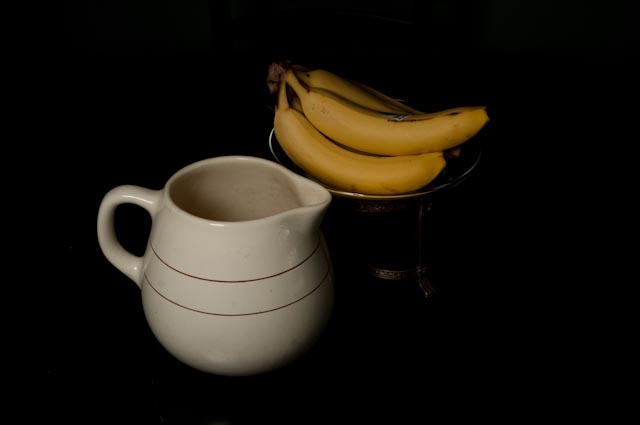
How I blend my flash with daylight if I am shooting indoors - First I establish my exposure in manual mode for the daylight that is coming in from a window. I work with the exposure until it looks just the way I want it to. With this initial shot you can now see what areas need a little more light added to them to bring out the final image. Now start adding some flash to the image. I start extremely low on the flash power if I am shooting very close to the subject. I usually set my flash to 1/128 power. If your flash does not go that low just back your flash away from the subject if you need to. Fire a test shot and re-adjust the flash power if necessary. Sometimes you will have to power up the flash to 1/8 or 1/4 power or even more. That becomes your choice. I also like to shoot with a small to medium softbox so that the light blends smoothly.

 The light was coming in from a window on the right. I established that exposure first (exposure was set to f/3.3 @ 1/45 sec - iso 400) and then added light to the cat's face and body with a Nikon SB-800 set to 1/128 power. The flash was mounted in a very small softbox - 8.5" x 8.5". The flash head had a diffuser on it to help soften the light even more.


 Same light setup as above except the exposure was f/4 @ 1/45 sec.

By the way.....this was a one shot deal. Got the dog to stay on the chair for just a few seconds. Grabbed the shot and the dog went on her merry way.

I think this method of light blending creates a warmness. Very pleasing to the eye.

Part 2 will be posted in just a few days.

Until next time.....Stephen H Causey


Thursday, March 29, 2012

Small Flash - Use Spill Light Creatively

You can use the light that spills over an object to your advantage. When you use light in this manner you ignore and skip shooting into the main source of the light and use the spill light as your main light.This creates a light that looks like it was shot through a snoot. The advantage of using this setup is that you can use more subjects in the shoot and not use a lot of snoots to achieve the same result.

If this seems hard to follow just take a look at the photographs that show how this is done. I made a reflector box from a piece of foam core. The reflector box is very similar to a strip box light. You place your remote flash or flash with a slave inside the box and just lay the foam core box on the floor. Point the opening toward the front of a sofa, chair or anything that will block the main part of the light and let some light spill over just slightly. Your subject will be near the area where the light spills over.

If you have a strip box, you can use that for this shot. The advantage of the foam core is that you do not have to worry about laying it on the floor and it is also very easy to angle the top edge of the foam core without moving any other part of the setup.  

My subject was my cat, which is an excellent to work with model, by the way. With an on or off camera flash point toward the other flash you can now take a test shot for proper exposure. If you do not have a flash head that will rotate then you can connect your flash by a flash sync chord and hand hold the flash pointing it in the direction of the other flash on the floor. If you have pocket wizards, then you control your flash without using the additional camera flash.

Here is the setup. The foam core reflector has a slight upward angle. Look closely and you can the cat on the sofa. You can always click on the pictures below for a larger view.

The light just slips over the edge of the sofa pillows and onto the face of the cat. 

The flash unit is just inside of the foam core box and is pointing to the rear of it so that all light that comes out of the box is reflected light.

It does not have to be a sofa to create this shot. Anything that blocks the main part of the light and allows it to spill over will work. (gobo)


This is how the light actually looks when it is spilling over the sofa cushions.


The final results................
I angled the reflector more for a slightly wider light coverage for this shot.


Just think of the possibilities with this setup. You can place several subjects in this setup. If you want to add a subject behind the front subject you can use a snoot for that one. Lots of options are available.


Now you have another method of lighting with a small flash to add to your arsenal.

Until next time.....Stephen H Causey

Wednesday, March 28, 2012

Small Flash - Back-light Bottles

An interesting way to use your small flash is to use it for back-lighting bottles of your choice. Set-up can take a few minutes but the results are very nice looking.

I used a very small flash with a slave attached to it for the back-lighting of the bottles. The slave will trigger the flash when another flash is fired. The flash that I used for the front lighting of the bottles and to trigger the small flash behind the bottles was a Nikon SB-800.

I did a test shot of the bottles and the proper exposure was f/22 @ 1/250. The flash that I used to trigger the small flash was set to a very low output for the first shot. It was set to 1/128 power, which was just enough to make the small flash fire.

To increase the clarity for the front of the bottles I had to increase the power of the front flash to 1/2 power and bounce it off the white ceiling. That seemed to be the correct amount of light output to make the bottles look very good.

The small flash that I used behind the bottles had one power for its light output and that was full throttle. I could have used another flash with variable light outputs but I chose to use this one because it was so small and could squeeze behind the bottles so easily.


Try this lighting technique out. It is very rewarding to see the nice light you can create using this method.
Let me know how your images turns out.

Until next time.....Stephen H Causey


Monday, March 26, 2012

Small Flash - Where To Get Accessories

If you are looking where you can buy accessories for your flash I think that one of the best places for small flash/strobes accessories would have to be Flash Zebra.com. They carry some amazing accessories. Check them out. 

B&H photo is the big boys candy store for photographers. What a great adventure just to look at the amazing selection of cameras, flashes and gear that they carry.

Until next time.....Stephen H Causey

Small Flash - Small Softbox

Small Softbox - So you've practiced with the snoot and really liked the results. Got that one under your belt and now you are ready for something else. How about a small softbox. I mean a really small softbox.....8.5" x 8.5". Now you can make one of these yourself like I did or you can purchase one online or at your favorite camera store. I made my softbox to fit my Nikon SB-800 flash with a diffuser on the flash.

Knock-out Results - What kind of results can you get from such a small softbox? Personally I think the results are quite amazing. You can always combine two or more types of  flash (snoot and small softbox) to get some super results, perhaps knock-out results in some cases.

TTL or Manual Setting on Flash - I like to use the TTL features of the flash when I shoot with this little softbox. It really give some nice results when you shoot like this. If you don't have this option and you want to shoot in manual mode that is perfectly fine also. You will get great results either way.

I will let this lesson speak for itself through the images shown below. You decide if this is an item you should add to your bag of camera tricks.

The first image consists of some bananas in a glass bowl. The softbox is postitioned about 1 foot to the left of camera. I set the flash exposure to minus 1 stop to help balance the image contrast and give what I thought was a better looking exposure.

Camera settings - f/9.5 @ 1/60 aperture priority - iso 200 - white balance 5560 (or just set the white balance to flash)


The second image has the same camera and flash settings but the softbox is held about 8" directly over the bananas. This make the stand that holds the glass disappear into black. Pretty nice look. 

This third image is made with the same settings as the two above. It could stand to either have the flash bumped up a stop or the aperture on the camera could have been opened up a stop to give a little more exposure. The light was about 2 1/2 feet from the subject which allowed for more depth to the light reaching both the pitcher and the bananas. 

The rolling pin and grater are next. The softbox was held at about the 10 - 11:00 position. It was about 18" from the subjects. You will see some areas in this photo that could use a little post work, I agree. Most of my images come straight from the camera without additional work done to them. That is not the way you would want to handle your photographs. You should use lightroom, photoshop or aperture to make your image or images look as good as possible. I just want to show you the results of how the light really falls on the subjects........ so post work is mostly not used for these examples.

An example of the small softbox and rolling pin/grater setup. An Nikon SB-800 with a small softbox aimed at the subjects. This is not the actual position of the light for the above picture.

The following is a simple shot  with the softbox aimed straight in at the cat on the bench. Not bad light, but it does create a shadow behind the cat. The flash/softbox is about 4 feet from the cat which gives more depth to the light. (The closer I move the light to the subject the more abrupt the fall off of light). The hardest part about this shot was getting the cat to stay on the bench.

For the last example of lighting with a very small lightbox I have photographed one of my dogs. A little dirty and she needs to be brushed, but an excellent subject. The softbox was held at about 4 feet from the dog. Yes, the exposure could have been bumped up a little but that little softbox still did a pretty good job.

I hope this opens up some possibilities for you. A small softbox can work wonders in some cases. Give it a try and see what you think.

Until next time.....Stephen H Causey


Saturday, March 24, 2012

Small Flash - Snoots

Here are some examples of snoots that you can use. I made the black snoot from a black plastic packing tube. To make the Pringles snoot it is just a simple matter of eating the chips first and then cutting out the bottom with a can opener. Just slide one of these over your flash unit and you are ready to go.


The longer the snoot, the smaller the light beam on the subject. If you do not want to make your own snoot you can buy some really nice ones online.


Below is a photograph of an orange slice in front of the pringles can snoot. The power of the flash is set as low as I could get it, which was 1/128 power. I used the built in pop-up flash to add just a small amount of light to the front. The power of the pop-up flash was set to about 1/64 power through the custom settings menu.
                                                                      Photography by Stephen H Causey - copyright 2012


Until next time.......Stephen H Causey

Thursday, March 22, 2012

Small Flash - Snoot Flash

Welcome back to Small Flash (blog). Let's jump right into something that can be very useful for your photography. Snoot flash. A snoot is a tube-like accessory that you place over your flash unit to restrict the light to a very specific area. It is a very controlled light source. Think of it as your little spot-light of creativity. You can make your own snoot very easily or purchase one to fit your needs.I will show some examples of different snoots in my next blog.

Why use a snoot? The main reason I use a snoot is to place emphasis on a certain area of the subject and to block off areas that are not interesting in or around the photograph. Once you start using a snoot it becomes habit forming. It is really interesting and fun to see the results of shooting with a snoot.

Off camera flash will give you the best results. Putting the snoot away from you camera will give you ultimate control of your light. Your will be able to achieve much better results by setting up your flash in this manner. You can hand hold the flash/snoot or place the flash/snoot on a light stand. You could also lay the flash/snoot on the floor and point it at the subject for a nice look or just use a "voice activated light stand" (a friend) to hold the flash/snoot.

Below is an example of shooting with a snoot with an off camera flash. (Lacey was my model for this shot and she was very cooperative.) I shot this with the flash set on manual at a very low power setting. The camera is also set on manual to f/ll @ 1/250.  The flash was triggered by a slave and another on-camera flash was pointing toward the slave to act as the "trigger" for the snooted flash.

Photography by Stephen H Causey - copyright 2012

Aim the snoot carefully and perhaps shoot several images while concentrating on the beam of light coming from the snoot. It may be necessary to make slight corrections to insure the light falls where you want it to.

This image has absolutely no adjustments or touch-ups made to it. It is straight out of the camera. That is one of the great things about shooting with a snoot. It looks like you post-processed the image in photoshop, aperture or some other photo-friendly program. You may still want to adjust some minor areas of the photograph but if you expose correctly and aim the snoot correctly your results are going to be fantastic to start off with. 

The snooted flash is on the left and I laid on the floor to photograph my dog "Lacey". Notice the reflection you can get by keeping your flash/snoot very low to the subject.

Give this method of light control a try and you will be hooked on the results.

Until next time......Stephen H Causey